
Tesla Delivery Day Inspection Checklist (2026): What to Check Before You Sign
Tesla Delivery Day Inspection Checklist (2026): What to Check Before You Sign

After weeks — sometimes months — of waiting, that “Your Tesla is ready for delivery” text finally lands, and it’s hard not to get excited. But here’s the honest truth: the twenty or thirty minutes you spend on delivery day may be the most important twenty minutes of your car’s entire warranty period. Rush the inspection, drive home, and then discover scratched paint, uneven panel gaps, or a chipped windshield, and once the reporting window has closed, you’re the one stuck arguing with Tesla.
This 2026 guide is written for buyers picking up their car anywhere in the United States or Canada. Whether you’re taking delivery of a refreshed Model Y (Juniper), a Highland Model 3, or a Cybertruck, the inspection logic is the same. Below I walk through everything to do — from the moment you order, through delivery day itself, to your first week of ownership — including the small details first-time buyers almost never think of: how to reboot the touchscreen with the scroll wheels, where Juniper’s USB-C ports are actually hidden, what document to sign when you spot a defect, and how Canadian PDI differs.
Disclosure: some links in this article are affiliate/referral links. If you order or buy through them, we may earn a small commission or referral credit at no extra cost to you. This is general guidance only — prices, policies, and program terms are set by Tesla, so always confirm against the official Tesla pages and the delivery paperwork you actually receive. See our disclosure page.
Key takeaways
- Inspect before you accept: paint, panel gaps, glass, wheels, interior trim, charge port and every camera, in daylight if at all possible.
- Reboot the screen, run a software check and confirm Wi-Fi, Bluetooth and the phone key before you leave the lot.
- Anything Tesla agrees to fix goes on the Due Bill in writing before you sign; verbal promises do not survive delivery day.
- Sort financing (1.49% to 1.99% promotional APR as of September 2026) and insurance with the VIN before delivery day, not on it.
- Canadian buyers: the Model Y RWD still gets the $5,000 EVAP rebate, and new orders are now quoting delivery in December 2026 to January 2027.
📋 Contents
- From order to delivery: the homework to do in advance
- Delivery day: what to bring, when to arrive, and the right mindset
- Exterior inspection: paint, panel gaps, glass, and wheels
- Lights, cameras, and charge-port function checks
- Interior inspection: seats, screen, USB, climate, and rattles
- Power-on details: account pairing, mileage, tire pressure, and included items
- When you find a problem: Due Bill, the reporting window, and the line you hold before signing
- Special notes for Canadian owners
- Your first week: truly making the car your own
- Frequently Asked Questions
- Final thoughts
From order to delivery: the homework to do in advance
Most people assume the inspection is a delivery-day event. In reality, the moment you tap “Order,” the clock starts. Tesla delivery timelines in North America typically run anywhere from 2 to 8 weeks depending on model, configuration, and regional inventory. Don’t just sit and wait — a few things need to be lined up ahead of time.
First, and most easily overlooked yet most valuable: use a referral link before you place the order. In 2026 Tesla long ago swapped its old cash incentives for software perks — a new buyer who orders a Model 3, Model Y, or Cybertruck through an owner referral link gets 3 months of free FSD (Supervised). At the current North American price of about $99/month, that’s roughly $297 in value, though it generally can’t be combined with the 30-day trial new cars come with, and Tesla confirms the final perk on your order. The catch is sequence: the link has to generate the order, and once the order is submitted Tesla cannot add the perk after the fact. If you haven’t ordered yet, you’re welcome to use our owner referral link — finish the order and those 3 months attach to your account automatically. If you’ve already ordered, don’t bother; it can’t be added retroactively.
Second, the order fee. In the US you’ll pay an order fee; in Canada it’s typically around CA$250. This amount rolls into the vehicle price once you settle the balance at delivery and is generally refundable per the order terms. Through 2026 Tesla has run aggressive financing to move volume — as of September 2026, most Model Y trims sit at 1.49% APR over up to 72 months and Model 3 Premium and Performance at 1.99% (the summer 0% and 0.99% offers ended in August), though these terms change monthly, so go by what the official site shows when you order. If you’re financing, lock your loan in and complete the credit check during the order stage so delivery day isn’t chaos.
Third, insurance. This is where the most people get tripped up. Tesla requires active insurance before you take the car, and you must be able to show a valid policy on delivery day — the VIN on your insurance card or digital policy has to match. A few days before delivery the VIN usually appears in the app; the moment you have it, call your insurer to add the car. Rules vary enormously by US state and Canadian province. Canadian owners can compare ahead of time using our Tesla insurance guide for Canada.
Fourth, accessories. Floor mats, a screen protector, and a Sentry Mode USB drive are best bought before delivery so you can install them the same day rather than living with factory rubber smell and fingerprints. A new-car paint depth gauge is a small, worthwhile tool for verifying the finish — you can find one on Amazon US or Amazon Canada.
Delivery day: what to bring, when to arrive, and the right mindset
Start with mindset: you’re there to accept a product worth tens of thousands of dollars, not to grab a parcel from a locker. Tesla delivery advisors are usually courteous, but they may have dozens of cars scheduled that day, and the pace can feel rushed. You have every right to inspect the car calmly before you sign. Remember one thing — before the money is paid and the papers are signed, you hold the leverage; once you’ve signed and driven off, you’ve handed it over.
Bring these with you:
- Your phone, fully charged. The Tesla app is your “key” for the whole handover — you’ll use it to unlock and pair the car. Install the app in advance and log in to the same account you used to order.
- Proof of valid insurance. Paper or digital is fine; the VIN must match.
- Driver’s license and payment method. Confirm with the delivery center in advance exactly how the balance is paid — wire transfer, cashier’s check, or loan funding.
- A clean cloth and some water (or wipes). The body may have transport dust on it; wiping a panel down makes paint defects far easier to see.
- A power bank or backup light source. If your appointment is in the evening or at a dimly lit indoor center, raking your phone’s flashlight across the paint at an angle is remarkably good at revealing flaws.
For timing, aim for a daytime slot with good light and avoid heavy rain. A rain-covered body hides scratches and paint defects entirely. If you can only pick up in the rain, dry the car off or ask to move it under cover before inspecting. Don’t feel awkward asking — it’s a reasonable request.
Exterior inspection: paint, panel gaps, glass, and wheels
The exterior is the heart of the inspection and the hardest thing to dispute once the reporting window closes. Walk the car at least twice: once standing back to take in the whole panel, once up close for the details.
Paint and body. In natural or raking light, look for scratches, dents, paint runs, orange peel, and signs of touch-up. Found a suspected scratch? Drag a fingernail gently across it — if your nail “catches,” the damage has gone into the base coat and is a serious defect; if your nail glides over with no resistance, it’s a surface mark that can usually be polished out. Dark colors (black, deep blue, Quicksilver) show flaws more readily, so inspect them more carefully.
Panel gaps. Tesla’s build quality has improved a lot in recent years, but uneven gaps remain a known weak spot. Check that the gaps at symmetric left/right positions are equal in width, that the frunk lid sits even on both sides once closed, and that the doors and trunk close flush. On Juniper, check the seams where the front and rear light bars meet the body — gaps that are too wide aren’t just ugly, they create wind noise at highway speed.
Glass. Go over the panoramic glass roof, the front and rear windshields, and all four door windows one by one for chips, cracks, and scratches. Pay special attention to any fog or moisture between the glass layers — if there’s haze inside a laminated pane, the seal has failed, and you must flag it on the spot.
Wheels and tires. Check all four wheels for curb rash from transport or staging, and the tire sidewalls for bulges or cuts. While you’re down there, confirm the four tires are the same brand and model, with normal manufacturing dates. I keep an AstroAI digital tire pressure gauge in the door pocket for exactly this moment — cars fresh off the transporter are often over- or under-inflated, and a ten-second reading at each wheel tells you whether the numbers match the door-jamb label.
Door handles and charge port door. Juniper and Highland use semi-flush door handles — press each one and confirm it pops out smoothly, returns properly, and sits flush with the body. A handle or charge-port door that protrudes isn’t just cosmetic; it adds wind noise and drag at speed.
A veteran owner’s habit: record video of the entire inspection on your phone. Walk the car once, capturing the paint, gaps, glass, and wheels, then film the delivery environment and the time. If a dispute later arises over whether a defect existed before delivery, that timestamped video is your strongest evidence. Photos miss angles; one continuous video clip is the easy fix — it takes under a minute, so don’t skip it. Inspecting isn’t nitpicking — it’s drawing a clean line on responsibility at the moment of handover, which protects you and actually saves Tesla future hassle too.
Lights, cameras, and charge-port function checks
With the static exterior done, move on to the functional components — the part first-time buyers most often skip.
Lights. Ask the delivery advisor to help, or use the app/screen to light each in turn — headlights, daytime running lights, Juniper’s signature full-width light bar, turn signals, brake lights, reverse lights, and fog lights. Confirm each cluster fully illuminates with no dead segments or internal condensation.
Cameras. Tesla’s surround cameras are the eyes of Autopilot and FSD. Gently wiggle the side cameras on the front fenders, the front camera above the front plate area, and the reverse camera housing near the trunk button to check for looseness. Then pull up each camera feed on the screen and confirm none are blurry, black, or out of focus. Open the backup view and the side views one at a time.
Charge port. Open the charge-port door and check that it opens and closes smoothly and seats fully, with a normal indicator light. If there’s a charger on site, actually plug in to confirm it handshakes and lights up. Juniper and the newer cars use the NACS connector — plug straight into a North American Supercharger. If you also need to charge at third-party J1772 stations, ask whether an adapter is included.
Interior inspection: seats, screen, USB, climate, and rattles
Once you’re inside, don’t post to social media yet — go through the cabin first.
Seats and power adjustment. Run both front seats through every direction to the end of travel — forward, back, recline, and height — listening for noises or sticking. If you have ventilated or heated seats, turn each on and confirm airflow and heat work. Inspect the seat leather, door cards, and center console for scuffs, stains, or stitching defects.
Center touchscreen. This is a big one. First check for bright pixels, dead pixels, light bleed, or yellowing at the edges. Then perform a test: press and hold both steering-wheel scroll wheels for about 5 seconds to reboot the screen. Normally the display goes dark, then relights and boots cleanly. If it flickers wildly during the reboot or simply won’t come back on, that’s one of the few defects worth refusing delivery over — call the advisor immediately.
USB and wireless charging. The refreshed Juniper Model Y has a different USB-C layout from the older car — there’s a USB-C in the storage tray under the center armrest, and two more below the rear screen. Plug your phone into each port and confirm it charges and transfers data (the Sentry Mode drive goes in a port that can read and write). Set your phone on each of the two front wireless charging pads and confirm they charge without overheating.
Climate and controls. Run the A/C and the heat, listen to and smell the airflow, and confirm left/right vents and defrost all work. Cycle the wipers, washer spray, horn, sunshade (if equipped), powered liftgate, and the auto-lock on each door and the trunk.
Rattles. Close every door and squeeze the black plastic mirror housings to check for play or rattles. As you open and close doors, listen for unusual sounds from the hinges or seals. A new car will have some assembly tolerance, but note any obvious rattles.
Power-on details: account pairing, mileage, tire pressure, and included items
With the functional checks done, a few “soft” details remain.
| Check | What to look for / normal range |
|---|---|
| Odometer reading | A new car is usually within a few dozen miles (factory, transport, staging); over 100 miles, ask why |
| Software version | Check the version in the car; an OTA update will likely push shortly after delivery |
| Tire pressure | All four tires even and near the value on the door-jamb label |
| Account pairing | Car is linked to your app account; the mobile app can unlock and see this vehicle |
| Included items | NACS charge cable (included in some regions, separate purchase in others), quick-reference card, and key cards |
A word on the key cards: confirm the number of physical cards matches what you’re owed (usually two), and that you can successfully add each one in the car and unlock by tapping it. Set up the phone Bluetooth key on the spot too, so walk-up unlock works and you can shift into gear once seated.
One more tip: do as much of the inspection yourself as possible rather than letting the advisor do it all. Operating each control yourself familiarizes you with the car and makes you less likely to miss something.
When you find a problem: Due Bill, the reporting window, and the line you hold before signing
No car is perfect, and finding minor issues is normal. What matters is handling them correctly.
First principle: document every issue in writing before you sign for the car. At Tesla, the mechanism is the Due Bill — defects written into the delivery paperwork with an agreement to repair them later at no charge. Confirm it with the advisor on the spot, have them create the record in the system, and photograph the defect yourself (capture the time and odometer too). A verbal “we’ll fix that for you later” doesn’t count — get it on the document.
Second, the reporting window. For cosmetic and workmanship defects like paint, panel alignment, and glass chips, Tesla applies a fairly tight reporting window — the widely cited rule of thumb is to report within 100 miles of delivery and as soon as possible (many owners aim for 72 hours). Miss the window and these cosmetic issues may no longer be handled free as a delivery-quality matter. The exact wording varies by location and official terms, so go by the paperwork you receive and Tesla’s official policy. Even if you didn’t catch everything on delivery day, re-inspect carefully in the first day or two — before the miles add up — and report anything immediately through the app, keeping records.
Third, when should you consider refusing delivery on the spot? The vast majority of minor flaws can be resolved through a Due Bill, so refusal is rarely necessary. But for serious defects — a touchscreen that won’t boot, structural or accident damage, a VIN that doesn’t match the contract, or severe, unrepairable body damage — refusing or requiring repair before acceptance is worth weighing. Refusal is a big deal that affects your delivery scheduling, so think it through.
Fourth, don’t get pushed by “you have to drive it away today.” If a problem is serious enough that you’re uncomfortable, you have the right to require it be fixed before delivery. Stay polite, but hold your line — it’s your right.
Special notes for Canadian owners
The overall pickup process in Canada mirrors the US, but a few differences are worth calling out.
- Delivery and registration. Vehicle registration and plating differ by province; Ontario, BC, and Quebec each have their own procedures and fees. Confirm with your local delivery center how registration and temporary plates are handled, so you don’t take delivery only to find you can’t legally drive.
- Winter tires. Quebec legally mandates winter tires during the winter period; other provinces don’t require them but strongly recommend them. If you’re taking delivery in winter, factory all-season tires perform poorly on ice and snow, so have a winter-tire plan ready on delivery day. This is one reason to confirm the included tire type and read the sidewall markings during inspection.
- Financing and tax. The order fee, taxes (GST/PST/HST depending on province), and registration fees are all settled at delivery — request the itemized balance and review it before pickup.
- Insurance. BC’s ICBC and the various provincial rules differ a lot; coverage must be in force before pickup. For ways to save, see our Tesla insurance guide for Canada.
For context, as of September 2026 the Canadian Model 3 starts at CA$39,490 and the Model Y at CA$49,990, and the Model Y RWD still qualifies for the federal $5,000 EVAP rebate, bringing its effective price to about CA$44,990. Canadian Model Y orders are now quoting delivery in December 2026 to January 2027, so if your car finally lands after a long wait, that is all the more reason to check it carefully. Strong value, plenty of new owners picking up cars, and all the more reason to do this inspection properly.
Your first week: truly making the car your own
Driving home isn’t the finish line. A few things still need doing in the first week.
- Inspect the car again. Before you cross 100 miles, re-examine the paint, gaps, and glass in good light in your own garage. Found a problem? Book service through the app immediately and keep records.
- Activate and try the FSD trial. New cars come with a 30-day FSD (Supervised) trial; if you ordered through a referral link, you have the 3 referral months, which generally don’t stack with the trial (Tesla confirms the final perk on your order). One thing worth knowing going in: since late January 2026, new North American Teslas no longer include basic Autopilot — once your trial ends, the car falls back to traffic-aware cruise control only (no Autosteer) unless you subscribe to FSD at $99/month. So use the trial window to genuinely decide whether FSD is worth it to you. Find a familiar road and build trust gradually under safe conditions — don’t hand everything over to it right away.
- Run an OTA update. Connect to your home Wi-Fi and watch for software update pushes — new features, parental controls, and dashcam tools often arrive this way.
- Install accessories and set up the Sentry drive. Put on the floor mats and screen protector, then plug in and format the Sentry Mode / dashcam storage so your “electronic witness” goes on duty immediately. A high-endurance drive built for 24/7 writes is the right tool — the compact SanDisk Ultra Fit 256GB is the easy plug-and-forget pick (also on Amazon Canada).
- Build your charging habits. Once your home charger is installed, charge at home whenever you can — daily electricity is cheaper than Supercharging; save the Superchargers for road trips.
Get those done, and the car is finally, properly yours.
Frequently Asked Questions
How long does a Tesla delivery inspection take?
Done at a relaxed pace, exterior plus interior plus functional checks run about 20 to 40 minutes. Don’t rush — twenty extra minutes on delivery day can save you several trips to a service center later. A well-lit, rain-free slot makes the inspection most efficient.
I found scratches or uneven panel gaps on delivery day — can I still get them fixed?
Yes, and the sooner the better. Before you sign for the car, get every issue written into a Due Bill, have the advisor create the record in the system, and photograph everything for your own files. Cosmetic defects like paint, alignment, and glass have a tight reporting window (the common rule of thumb is within 100 miles and as soon as possible — go by your delivery paperwork and official terms), and raising them after the window has closed invites disputes.
How do I get the 3 months of free FSD with a referral link?
It’s all about sequence — you must open the owner referral link before ordering so that it generates the order; only then does the 3 months of free FSD (Supervised) attach to your account. Once the order is submitted, Tesla can’t add the perk after the fact. At the $99/month subscription price, those 3 months are worth about $297.
When should I refuse delivery on the spot?
The vast majority of minor flaws can be resolved through a Due Bill, so refusal usually isn’t needed. Only for serious defects — a touchscreen that won’t boot, structural or accident damage, a VIN that doesn’t match the contract, or severe, hard-to-repair body damage — should you carefully consider refusing or requiring a fix before acceptance. Refusal affects your scheduling, so weigh it before deciding.
How is Canadian delivery different from the US?
The overall process is the same; the main differences are registration and plating (procedures and fees vary by province), winter tires (mandatory in Quebec, strongly advised elsewhere), tax type (GST/PST/HST depending on province), and insurance rules (such as BC’s ICBC). Sort these out before pickup so you don’t end up with a car you can’t legally drive. For more on configuration choices, Canadian owners can also browse our Tesla coverage.
Final thoughts
Taking delivery is a happy occasion — but don’t let the excitement make you skip the inspection. Save this checklist to your phone and work through it on delivery day, line by line: exterior, lights and cameras, interior and functions, power-on details. Document any issue in a Due Bill on the spot, keep records, and re-inspect once more before you hit 100 miles. Get the process right, and all that’s left is to enjoy the car.
If this guide helped you avoid a pitfall and you haven’t ordered yet, you’re welcome to use our owner referral link — you’ll get 3 months of free FSD (Supervised), and it’s a small way to support this site at no extra cost to you. Wishing you a smooth delivery and safe travels.
Information currency: the delivery process, inspection points, and FSD/referral program rules in this article were compiled from Tesla’s official support pages, the Tesla Motors Club owner community, Not a Tesla App, and other public sources, cross-checked across multiple references, as of July 2026 and re-checked September 19, 2026. Tesla’s prices, financing offers, referral perks, and repair-reporting terms can change at any time — confirm all figures and policy details against Tesla’s official pages and the delivery paperwork you actually receive. This article is general guidance based on ownership experience and is not legal, tax, or purchase-decision advice; for insurance, tax, and registration specifics, consult Tesla and the relevant local authorities. Some links are affiliate/referral links; see our disclosure page.
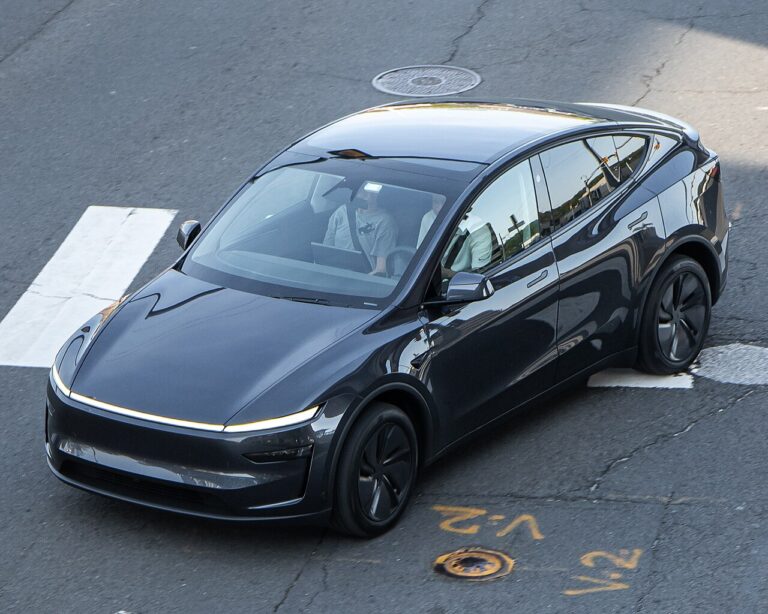
Image credit: “Tesla Model Y (Juniper), Washington DC metro area” by OWS Photography, licensed under CC BY 4.0, via Wikimedia Commons.
About the author: Lifei Zhou
Model Y owner since 2022Ontario STO registered apprentice · 310SWorks on Porsche, Mercedes, BMW, Audi weeklyHundreds of readers referred (est.)
Lifei is a Tesla owner based in Canada, writing practical, fact-checked Tesla guides for US and Canadian drivers — buying, ownership, insurance, charging, and TSLA investing, all from first-hand experience.