
Tesla Home Charger Installation (2026): Cost, Wall Connector & Tax Credit
Tesla Home Charger Installation (2026): Cost, Wall Connector & Tax Credit

In one sentence
A 2026 North American guide to installing a Tesla home charger: Wall Connector vs NEMA 14-50 costs, electrician needs, the US 30C tax credit deadline, and Canada rebates.
The moment most people pick up a new Tesla, the first thing they worry about isn’t tint or floor mats — it’s how to charge it at home. You’ve probably heard two opposite stories. One says “installing a home charger costs thousands of dollars, it’s a rip-off.” The other says “just plug into any outlet, don’t waste your money.” Both are half right, and both leave out the part that actually matters. In North America, more than 70% of the electricity you’ll ever put in an EV gets topped up in your own garage or driveway. Get your home-charging setup right and the next six or seven years are blissfully simple: plug in when you get home, leave with a full battery in the morning. Get it wrong and you’re either charging painfully slowly or paying an extra thousand dollars in installation you never needed.
This guide walks through home charging from start to finish: the real differences between the Mobile Connector, a NEMA 14-50 outlet, and the Wall Connector; how fast each one charges and what each costs to install; what the expiration of the federal 30C charger tax credit on June 30, 2026 means for you (and who can still claim it retroactively); and how Canada’s Ontario, BC, and Quebec rebates work — including why a Tesla-branded charger no longer qualifies in Ontario. By the end you’ll know exactly which route fits your situation, instead of getting whipsawed by electricians and forum threads that contradict each other.
Disclosure: some links in this article are affiliate/referral links (Amazon, Tesla’s referral program). If you order through them, we may earn a small commission at no extra cost to you. Prices here are rough ranges only — your final cost depends on official pricing and your electrician’s actual quote. This is general information, not tax, legal, or electrical advice. See our disclosure page.
Here’s the short answer up front, so you’re not left hanging: if your electrical panel is reasonably close to your parking spot and your budget is normal, going straight to a Wall Connector gives you the best experience. If you want to save money and can live with slightly slower charging, a NEMA 14-50 outlet paired with the Mobile Connector is plenty. Let’s break down each path.
📋 Contents
- The three home-charging routes, explained
- How fast does each one actually charge?
- Is the Wall Connector worth it?
- NEMA 14-50 outlet with the Mobile Connector: the value pick
- Installation costs, broken down: where the money actually goes
- The installation process: from order to power-on
- U.S.: the $1,000 federal tax credit has expired — here’s what’s left
- Canada: how Ontario, BC, and Quebec rebates work
- How much does home charging actually cost per month?
- Common pitfalls and money-saving tips
- Frequently Asked Questions
- Wrapping up
The three home-charging routes, explained
A lot of new owners jump straight to “which brand of charger should I buy?” — but that’s backwards. First decide which route you’re taking; the hardware is just one piece of it. In North America, home charging basically comes down to these three options:
- Mobile Connector on a standard 120V outlet (Level 1) — you plug the cable that came with the car into an ordinary three-prong wall outlet in your garage. Zero electrical work, zero installation cost. The catch is that it’s brutally slow: only 3 to 5 miles of range per hour, so an eight-hour overnight charge nets you barely 30-plus miles. Fine if your daily commute is very short, or as a backup.
- NEMA 14-50 outlet with the Mobile Connector (Level 2) — you have an electrician install a 240V NEMA 14-50 outlet in your garage (the same big outlet used for ovens and RVs), then plug in using the Mobile Connector’s 14-50 adapter. On this outlet the Gen 2 connector pulls up to 32 amps, roughly 30 miles of range per hour — an easy overnight full charge. This is the best-value middle ground.
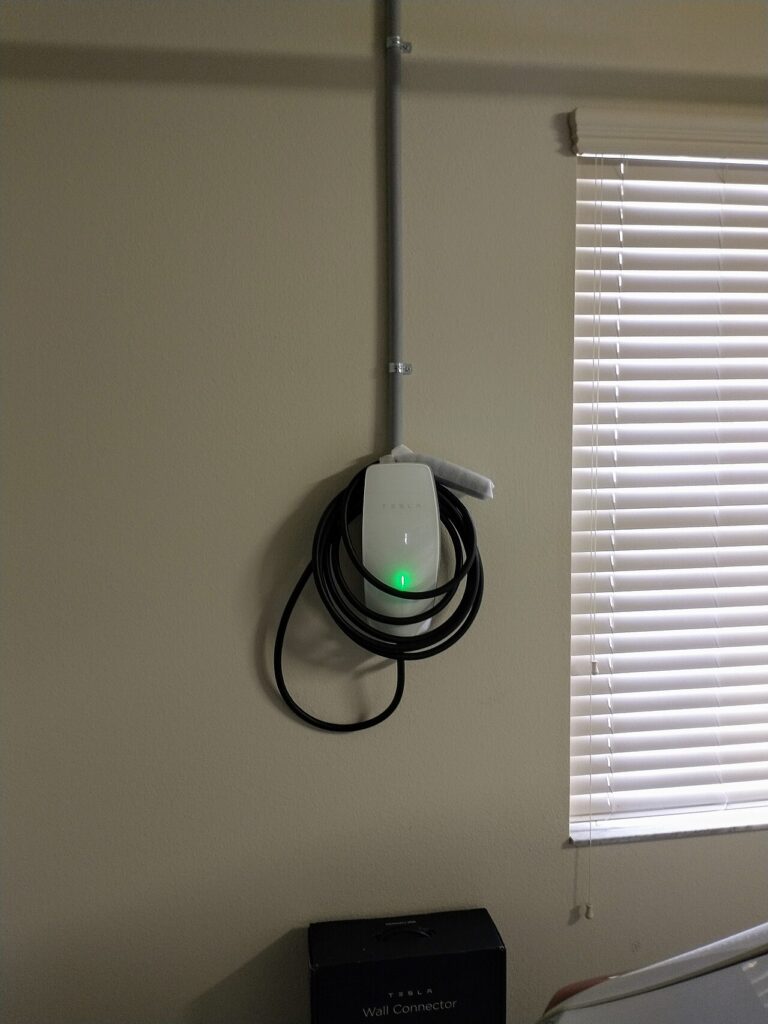
- Wall Connector (Level 2) — Tesla’s permanently mounted, hardwired charger. Up to 48 amps and 11.5 kW, adding as much as about 44 miles of range per hour. It has Wi-Fi, app-based monitoring, and load sharing across multiple units. It’s the smoothest experience, but hardware plus installation usually runs a few hundred dollars more than the outlet route.
One detail people constantly miss: the Mobile Connector and the Wall Connector are both Level 2 (240V). What actually sets your charging speed isn’t the “charger” itself — it’s the amperage the circuit delivers. A 120V household outlet is Level 1, and slow. 240V is Level 2, and fast. The table below makes the speed gap concrete.
How fast does each one actually charge?
The figures below are estimates for common setups. Range added per hour varies a little by model and battery temperature; these are mid-range numbers from Tesla’s official specs and mainstream reviews:
| Charging method | Voltage / current | Power | Range added per hour | 20% → 80% (approx.) |
|---|---|---|---|---|
| Standard outlet (Level 1) | 120V / 12A | ~1.4 kW | 3–5 miles | 30+ hours |
| NEMA 14-50 + Mobile Connector | 240V / 32A | ~7.7 kW | ~30 miles | 6–8 hours |
| Wall Connector (48A) | 240V / 48A | ~11.5 kW | ~44 miles | 4–5 hours |
See the pattern? Going from a standard outlet to 240V multiplies your speed several times over. But stepping up from the 32-amp outlet setup to the 48-amp Wall Connector only buys you about 40% more speed. For the vast majority of households — drive 30 to 50 miles a day, plug in overnight — 32 amps is more than enough. Both setups finish charging while you sleep. The people who genuinely need the full 48 amps are high-mileage drivers who park for short windows, or two-EV households taking turns on a single charger.
Is the Wall Connector worth it?
Let’s put the specs on the table. The current third-generation Wall Connector retails for roughly $450 to $500, with these key parameters:
- Up to 48 amps and 11.5 kW, adding as much as about 44 miles of range per hour;
- A 24-foot (about 7.3 m) cable, so it still reaches even if your parking spot is a bit far from the unit;
- Wi-Fi connectivity — view charging history in the Tesla app, push firmware updates remotely, and set access permissions;
- Power Share support — chain up to 6 units on one circuit to share current, ideal for multi-car households;
- Indoor or outdoor installation, with a 4-year residential warranty;
- A NACS (North American Charging Standard) connector. If you also have a non-Tesla EV with a J1772 port, you’ll need an adapter, or step up to the Universal Wall Connector that handles both.
The Wall Connector’s appeal isn’t just speed. It’s permanently hardwired, so you never have to plug and unplug a portable cable; the wiring is thicker and more durable for daily long-term use; and once it’s online it can automatically shift charging to off-peak hours under a time-of-use rate plan. If you’re keeping the car for years and your garage is a fixed charging spot, those few hundred dollars are well spent. You can pick up the official Tesla Wall Connector on Amazon US or Amazon Canada, or order it from Tesla’s online store — pricing is roughly the same.
When can you skip the Wall Connector? If you rent, your parking spot changes, or you might move soon, permanent hardwiring doesn’t pay off — installing and removing it is a hassle. In that case the Mobile Connector plus an outlet is more flexible: pack it up and take it with you when you go.
NEMA 14-50 outlet with the Mobile Connector: the value pick
This route is a longtime owner favourite for one simple reason: it’s cheap, it’s enough, and it’s flexible. You have an electrician install a 240V NEMA 14-50 outlet on your garage wall, plug in the Mobile Connector’s 14-50 adapter, and you’re charging at 32 amps and about 30 miles of range per hour. Plug in when you get home, and it’s full by morning.
Two small things to watch. First, the Mobile Connector doesn’t always come with new cars anymore — Tesla switched to selling it separately a few years back, with the Gen 2/Gen 3 connector running a bit over $200 officially. Some 2026 trims (such as the refreshed Model Y) bundle one in again, so confirm before you order. Second, the Mobile Connector typically only ships with the standard outlet adapter; to use a NEMA 14-50 you’ll need to buy the 14-50 adapter separately. Tesla and third parties both sell these — third-party versions run roughly $40 to $80 — just make sure you get one rated for 32 amps. You can compare 14-50 adapters on Amazon US or on Amazon Canada.
If your panel is right next to the garage and the wiring run is short, the total install for the outlet route can actually come in a couple hundred dollars below a hardwired Wall Connector. The trade-off is that your speed is capped at 32 amps and about 30 miles per hour — but as noted above, for a daily commuter that gap charges away overnight and you’ll never feel it. So if you’re budget-conscious and not a heavy-mileage driver, this setup is an easy call.
Installation costs, broken down: where the money actually goes
This is the part everyone cares about most. Why do home-charging install quotes range anywhere from seven or eight hundred dollars to three or four thousand? Because the total is built from several pieces, each one tied to your specific home:
- Hardware — a Wall Connector is about $450–500; on the outlet route, a NEMA 14-50 outlet is a few tens of dollars, the Mobile Connector is $200-plus, and the adapter is $40–80.
- Electrician labour — a licensed electrician runs roughly $75–125 an hour, and a standard install usually takes 1.5 to 3 hours.
- Circuit and materials — a dedicated 240V circuit, breaker (a Wall Connector typically uses a 60-amp breaker), cable, conduit, mounting hardware, and so on usually add $500–1,500, mostly depending on how far the run is from panel to parking spot.
- Permit and inspection — most municipalities require an electrical permit and inspection, anywhere from a few tens to a couple hundred dollars; a proper electrician handles this for you.
Add it all up, and the common scenarios look roughly like this:
| Difficulty | Typical situation | All-in price range (USD) |
|---|---|---|
| Simple | Panel inside the garage right next to the parking spot, short run, plenty of panel capacity | $700–1,200 |
| Standard | Run across the garage wall or a moderate distance, no panel upgrade needed | $1,200–2,000 |
| Complex | Long run, drilling through walls/beams, or panel out of capacity and needing a main-panel upgrade | $2,500–3,500+ |
The two biggest variables behind that spread are: how far it is from your panel to your parking spot (longer runs mean more material and labour), and whether your main panel has any spare capacity. Older homes often have a panel that’s already maxed out, and adding a 60-amp circuit may require a panel upgrade first — that single item alone can run over a thousand dollars. So before you commit, have an electrician assess your panel in person or from photos; don’t wait until the job starts to discover you need an upgrade.
On hardwired Wall Connector vs. an outlet: the outlet route’s cable and outlet are cheaper, but in many areas installing a big 240V outlet still requires its own dedicated circuit and permit, so the total install costs end up fairly close — the real difference is in the hardware itself. The genuine money-saver, always, is a short run and a panel that doesn’t need upgrading.
The installation process: from order to power-on
First-timers often feel uncertain, but the process is straightforward:
- Decide on your route and hardware — settle on Wall Connector vs. outlet first, then buy the matching hardware (or have the electrician source it).
- Get a licensed electrician to assess — get quotes from at least two or three licensed electricians and have them look at your panel location, capacity, and wiring path. Don’t just compare totals; ask whether the quote includes the permit and materials.
- Pull the permit — a proper install requires an electrical permit from your municipality; the electrician usually handles this. Don’t skip it to save a hundred bucks, or you could run into trouble when selling the home or filing a claim later.
- The install itself — the electrician runs the dedicated circuit, installs the breaker, mounts the charger or outlet, wires it, and tests it. For a Wall Connector, they’ll also connect it to Wi-Fi and set up the app.
- Inspection — the municipality sends someone to inspect and sign off, and the whole setup is legal and ready to use.
One practical tip: when getting quotes, always shop around — different electricians can quote double for the same job. And put the key points in writing on the quote — whether the permit is included, whether a main-panel upgrade is included, and how long the cable run is — so you don’t get hit with add-ons once work begins.
U.S.: the $1,000 federal tax credit has expired — here’s what’s left
U.S. readers, an important update: the federal tax credit for home charging equipment — the Alternative Fuel Vehicle Refueling Property Credit (30C), worth 30% of combined equipment-plus-installation cost up to $1,000 per charging port — expired on June 30, 2026. Any charger installed and placed in service after that date no longer qualifies. If you’re installing now, plan your budget without it.
The one group this still matters for: if your equipment was installed and operational on or before June 30, 2026, you can still claim the credit retroactively by filing IRS Form 8911 with your tax return for that year — the deadline was about when the charger was placed in service, not when you file. Keep your invoices and permit paperwork. Note the credit also carried a census-tract restriction: the home had to sit in a “low-income community” or “non-urban” census tract, which you can verify with the IRS’s Refueling Infrastructure Tax Credit Mapping Tool. Whether and how much you can actually claim depends on your tax situation — consult a tax professional for a larger amount.
For everyone installing from July 2026 onward, the money to chase is at the state and utility level: plenty of states and utilities offer their own home-charging or EV rebates, plus dedicated EV time-of-use rates — California, New York, and others especially. These change often, so check your own utility’s website for the latest EV charging rebate before you book the electrician.
Canada: how Ontario, BC, and Quebec rebates work
Canada has no federal cash rebate for residential charging hardware (the federal ZEVIP program is mainly for commercial and public projects), but several provinces have provincial rebates for home charging on detached houses:
| Province | Home Level 2 charger rebate | Notes |
|---|---|---|
| Ontario | Up to 50%, capped at CAD 350 | Note: Tesla-branded products no longer qualify as of March 12, 2025 |
| British Columbia | Up to 50%, capped at CAD 350 | Applies to detached, townhouse, and duplex homes |
| Quebec | Up to CAD 600 for purchase plus installation | 240V Level 2 home charging |
Here’s the catch that matters most to Tesla owners: Ontario’s home-charging rebate now excludes Tesla-branded products (as of March 2025). That means in Ontario, if you install a Tesla Wall Connector, you likely won’t get that CAD 350 — to claim the rebate, you’d need to choose a qualifying third-party Level 2 charger. BC and Quebec currently have no such brand-specific exclusion, but each program’s list of eligible models and application windows changes, so always confirm the latest terms on the provincial program website or with a body like BC Hydro before applying.
Canadian readers have another money-saving move: many provinces price electricity on time-of-use rates, with the cheapest power in the overnight hours. Set your charging to the late-night off-peak window and your electricity bill drops meaningfully over time. Once online, the Wall Connector lets you set scheduled charging right in the app — plug in and it automatically waits for the off-peak window before it starts.
How much does home charging actually cost per month?
A lot of people worry that charging at home every day will blow up their power bill. In reality it’s far cheaper than you’d think — and far cheaper than gas. Residential electricity rates vary a lot by region: most U.S. states fall somewhere around $0.12 to $0.30 per kWh, while hydro-heavy Canadian provinces like Quebec and BC are cheaper, often $0.10 to $0.15 CAD per kWh. Let’s use a mid-range number.
A Tesla’s real-world consumption is roughly 0.25 to 0.30 kWh per mile. Say you drive 1,200 miles a month at $0.18 per kWh:
- Monthly energy use: about 1,200 × 0.27 ≈ 324 kWh;
- Electricity cost: about 324 × 0.18 ≈ $58/month;
- That’s under 5 cents per mile, versus 12 to 18 cents per mile in fuel for a comparable gas car at today’s prices.
So for the same 1,200 miles, charging a Tesla at home costs around fifty or sixty dollars a month — less than half what gas would run. Add in off-peak time-of-use charging and your per-kWh rate can drop 30 to 40%, easily pushing the monthly bill down to thirty or forty dollars. That’s exactly why setting up home charging and getting in the habit of plugging in at night beats relying on Superchargers — those are billed per session, and over time the difference really adds up.
Common pitfalls and money-saving tips
Finally, here are the mistakes longtime owners have made and the tricks they’ve learned, in one place:
- Don’t chase 48 amps blindly — with a single car and a daily commute, the 32-amp outlet setup feels nearly identical and costs less. 48 amps is mainly for heavy users and multi-car homes.
- Check your panel capacity before you order — an older home with a maxed-out panel may need a main-panel upgrade, which can run over a thousand dollars. Get an electrician to assess it early so your budget doesn’t blow up.
- Always pull the permit — saving a hundred or two on the permit isn’t worth it; an unpermitted install can bite you at a home inspection or in a claim, and there are safety risks.
- Get multiple quotes — licensed electricians vary widely; ask at least three and get the permit, materials, and panel-upgrade details in writing.
- Charge off-peak — use time-of-use off-peak windows with scheduled charging in the app; the long-term savings are bigger than you’d expect.
- U.S.: the federal 30C credit is gone — it expired June 30, 2026. If your install was powered on by that date and your address met the census-tract requirement, claim it retroactively on Form 8911; otherwise, hunt for state and utility rebates instead.
If you’re still deciding whether to order a car, one quick note: ordering a new Tesla through an owner referral link currently gets you 3 months of free FSD (Supervised) — at the $99/month subscription price, that’s worth about $297, roughly enough to cover part of your home-charging install. If you’d like it, you can use our Tesla referral link — it doesn’t affect your price in any way. For more on Tesla ownership in the U.S., browse our U.S. Tesla guides.
Frequently Asked Questions
Do I have to install a Wall Connector?
No. If your daily commute is short and you can charge overnight, a NEMA 14-50 outlet with the Mobile Connector (32 amps, about 30 miles of range per hour) is plenty, and cheaper. The Wall Connector is mainly for people who want the fastest speed, have a permanent parking spot, or run multiple EVs in one household. If you rent or might move, the outlet route is actually more flexible.
Can I claim that $1,000 U.S. charger tax credit?
Only if your install was completed in time — the 30C credit expired on June 30, 2026, and equipment placed in service after that date no longer qualifies. If your charger was installed and operational by June 30, 2026, and your home address fell within a qualifying “low-income” or “non-urban” census tract (check the IRS’s official mapping tool), you can still claim 30% of the combined equipment-plus-installation cost, up to $1,000 per port, on Form 8911 when you file. For new installs, look to state and utility rebates instead.
Can I get a provincial rebate for a Tesla charger in Canada?
It depends on the province. Ontario has excluded Tesla-branded products from its home-charging rebate since March 2025, so to claim that CAD 350 you’d need a qualifying third-party charger. BC (CAD 350 cap) and Quebec (CAD 600 cap) currently have no Tesla-specific exclusion, but eligible-model lists change, so confirm the latest terms on the provincial program or BC Hydro website before applying.
Is charging on a standard 120V outlet really too slow?
It’s slow, but not useless. A 120V outlet adds only 3–5 miles of range per hour, around 30-plus miles overnight. If you drive only a dozen or two miles a day and there’s an outlet right next to your parking spot, it can just barely serve as your main charging — but as soon as your daily mileage climbs, upgrading to a 240V Level 2 setup is strongly recommended.
Do I need a permit to install a home charger?
Yes, and it’s strongly advised. Most municipalities require an electrical permit and inspection for a 240V charging circuit. A licensed electrician handles the paperwork, for anywhere from a few tens to a couple hundred dollars. Don’t skip it to save money — an unpermitted install carries safety risks and can cause problems at a home inspection or with an insurance claim down the road.
Wrapping up
Home charging really comes down to two steps: first decide whether you’re going Wall Connector or outlet (based on your daily mileage, whether you have a fixed parking spot, and your budget), then find a reliable licensed electrician, get a few quotes, and pull the permit. U.S. readers, the federal 30C credit is now history — if your install beat the June 30, 2026 deadline, file for it retroactively; if not, check your state and utility for rebates. Canadian readers, watch the provincial brand restrictions and lean into time-of-use rates. Get this dialed in, and the next six or seven years are simple: plug in when you get home, leave full in the morning. That quiet confidence of never queuing for a Supercharger again is the best part of living with an EV. Here’s to leaving charging anxiety behind for good.
Information currency: prices, specs, and policy details in this article were cross-checked in July 2026 against Tesla’s official support pages, IRS guidance, Plug In America, Rewiring America, EnergySage, and Canadian sources including BC Hydro and Plug’n Drive. Charger prices, install quotes, the federal tax credit, and provincial rebate terms change over time and by region — the latest from official pages and your electrician’s actual quote govern. This is general information, not tax, legal, or investment advice; for the specific eligibility and amount of federal credits and provincial rebates, rely on the official rules and qualified tax/electrical professionals. Some links are affiliate/referral links; if you order through them we may earn a commission at no extra cost to you. See our disclosure page.
Image credit: “Tesla Wall Connector” by Whoisjohngalt, licensed under CC BY-SA 4.0, via Wikimedia Commons.

About the author: Lifei Zhou
Model Y owner since 2022Ontario STO registered apprentice · 310SWorks on Porsche, Mercedes, BMW, Audi weeklyHundreds of readers referred (est.)
Lifei is a Tesla owner based in Canada, writing practical, fact-checked Tesla guides for US and Canadian drivers — buying, ownership, insurance, charging, and TSLA investing, all from first-hand experience.