
Tesla DIY Care: Cabin Air Filter, Wiper Blades & Easy Fixes You Can Do Yourself (2026)
Tesla DIY Care: Cabin Air Filter, Wiper Blades & Easy Fixes You Can Do Yourself (2026)

In one sentence
How to replace your Tesla Model 3 or Model Y cabin air filter and wiper blades, check tire pressure, and clean the interior yourself in 2026 — the DIY jobs that save real money, plus what to leave to Tesla Service.
One of the quiet joys of Tesla ownership is how little routine upkeep the car actually demands. There is no oil to change, no spark plugs, no timing belt, and no annual tune-up. But “low maintenance” is not the same as “no maintenance,” and a handful of small jobs still need doing — replacing the cabin air filter, swapping worn wiper blades, keeping tires at the right pressure, and cleaning the interior without wrecking it. The good news for owners in the United States and Canada is that Tesla treats several of these as owner-serviceable, and doing them yourself saves real money over a service-center visit.
This guide walks through the jobs any Model 3 or Model Y owner can handle in a driveway with basic tools (or no tools at all), which parts to buy, and — just as importantly — which tasks are best left to Tesla. Everything here reflects 2026 pricing, parts, and Tesla’s current service documentation.
Disclosure: some links are affiliate/referral links. If you buy or order through them we may earn a commission at no extra cost to you. See our disclosure page.
📋 Contents
- Why DIY care makes sense for a Tesla
- Replacing the cabin air filter (Model 3 & Model Y)
- Wiper blades: sizes, replacement, and Wiper Service Mode
- Tire pressure and the no-spare reality
- Interior cleaning done right (and what to avoid)
- DIY vs. Tesla Service: cost and time at a glance
- Jobs to leave to Tesla (or a qualified EV shop)
- Frequently Asked Questions
- The bottom line
Why DIY care makes sense for a Tesla
Teslas need far less scheduled service than a gas car, which is a big part of their lower running costs. Tesla itself no longer publishes a fixed mileage-based service schedule; instead it lists a short set of maintenance items — cabin air filter, tire rotation, brake fluid check, and (in cold climates) caliper lubrication — and tells owners to attend to them as needed. Several of those items are things you can genuinely do at home.
The math is simple. A cabin air filter replacement at a Tesla Service Center or mobile appointment can run well over $150 with labor; the parts cost you a fraction of that. Wiper blades, washer fluid, and tire-pressure checks are the same story. None of these DIY jobs void your warranty — Tesla’s own manual describes the cabin filter as owner-replaceable — so long as you don’t damage something in the process. If you are still shopping for the car itself, note that ordering a new Model 3, Model Y, or Cybertruck through a Tesla referral link currently adds 3 months of free Full Self-Driving (Supervised), which generally doesn’t stack with the standard 30-day trial.
Before you start any job, keep two habits: work with the climate control off (for the filter) and never spray anything directly onto the car’s cameras or the center touchscreen. With that out of the way, here are the jobs worth doing yourself.
Replacing the cabin air filter (Model 3 & Model Y)
This is the single most worthwhile DIY task on a Tesla. The Model 3 and Model Y each use two stacked cabin filters mounted behind the passenger-side footwell. Tesla’s service documentation lists filter replacement as an owner task and recommends doing it roughly every two years — sooner if you drive in dusty, wildfire-smoke, or high-pollen regions, or if you notice weak airflow or a musty smell when the fan first spins up.
The job takes about 20 minutes and, on most kits, no tools beyond a plastic pry clip. The broad steps (always confirm against Tesla’s official DIY instructions for your model and build year):
- Turn the climate control off and slide the passenger seat all the way back. Remove the floor mat.
- Gently release the push clips on the plastic footwell trim panel, support it, disconnect the wiring connectors, and set it aside.
- Pull the upper filter out by its tab, then lift and remove the lower filter.
- Insert the new lower filter first, then the upper — making sure the airflow arrows printed on each filter point toward the rear of the car.
- Reattach the trim, then run the fan on high for a couple of minutes to clear any packaging dust.
For parts, buy a kit sized for the Model 3/Y. A set that ships with the pry tool and printed instructions — such as this EveryAmp cabin filter set — is the easiest starting point for a first-timer, since you won’t need to source a separate clip tool. If you live somewhere with heavy smog, smoke, or allergens and want the strongest filtration, step up to a HEPA-grade set with activated carbon like this BASENOR HEPA filter. Both sit in the $25–45 range for a pair, versus $150+ done at the service center. Whatever you choose, make sure it’s listed for your model years, and skip generic filters that don’t specify a Tesla fit.
Wiper blades: sizes, replacement, and Wiper Service Mode
Tesla’s single large windshield wiper and its shorter partner both wear out like any other car’s, and streaky, chattering blades are a safety issue in rain and snow. For the Model 3 and Model Y, the sizes are a 26-inch driver-side blade and a 19-inch passenger-side blade. (Model S and Model X use different sizes — check your manual before buying.)
A quality set of beam-style blades transforms wet-weather visibility. The Bosch ICON 26A + 19A pairing is a long-time owner favorite that matches the Model 3/Y sizes exactly; a pair typically runs in the $25–40 range. To swap them:
- Put the car in Wiper Service Mode: tap Controls > Service > Wiper Service Mode. This raises the wiper arm and stops it from snapping back while you work.
- Lift the arm off the glass, press the release tab on the old blade, and slide it off the hook.
- Clip the new blade on until it clicks, then gently lower the arm back to the glass.
- Exit Wiper Service Mode and test on a wet screen.
While you’re at it, top up the washer fluid (the reservoir cap is under the frunk, on the passenger side) and consider treating the glass with a rain-repellent like Rain-X for better beading at highway speed. Apply it to the windshield only — never to the camera housings or the rear glass area near sensors. For more cold-weather wiper and washer tips, see our Tesla winter driving guide.
Tire pressure and the no-spare reality
Every Tesla ships without a spare tire, which makes two habits non-negotiable: keeping pressures correct and carrying a plan for a flat. Under-inflated tires quietly erode range, wear unevenly, and handle worse; the U.S. Department of Energy notes that proper inflation is one of the simplest ways to protect efficiency (see fueleconomy.gov). Your car shows live pressures on the touchscreen, but a dedicated gauge is worth having for cold mornings — pressures drop about 1 PSI for every 10°F fall in temperature, which is why the warning light so often appears on the first cold day of fall.
The recommended cold pressure for your car is printed on the driver’s door-jamb sticker (commonly around 42 PSI on many Model 3/Y trims — always follow the sticker, not a generic number). A compact digital tire-pressure gauge costs under $15 and takes the guesswork out of it. And because there’s no spare, keep a tire repair and inflator kit in the frunk — it will get a small puncture sealed well enough to reach a shop. For everything about tire types, rotation intervals, and winter rubber, read our full Tesla tires guide for North America.
Interior cleaning done right (and what to avoid)
Cleaning your own cabin is easy DIY, but Teslas have a few materials that punish the wrong products. The big rules: never use ammonia- or alcohol-based cleaners on the touchscreen (they strip the anti-glare coating), avoid harsh solvents on the vegan-leather seats, and don’t use silicone-heavy “dressings” on the dashboard, which cause windshield glare and attract dust.
A gentle, water-based interior cleaner such as Meguiar’s Quik Interior Detailer handles the seats, door cards, and trim safely; use it with a clean microfiber towel, and for the screen use only a dry or lightly dampened microfiber cloth. If fingerprints on the big display drive you crazy, a matte tempered-glass screen protector cuts glare and makes smudges wipe off far more easily. For a complete interior-and-exterior wash routine (including what to do at a touchless car wash and how Car Wash Mode works), see our Tesla car wash and detailing guide.
DIY vs. Tesla Service: cost and time at a glance
| Job | DIY parts cost | At Tesla Service (est.) | DIY time | Difficulty |
|---|---|---|---|---|
| Cabin air filter (pair) | $25–45 | $150+ | ~20 min | Easy |
| Wiper blades (26″+19″) | $25–40 | $60–90 | ~10 min | Very easy |
| Washer fluid top-up | $5–10 | n/a | ~2 min | Very easy |
| Tire pressure check | $10–15 (gauge) | n/a | ~5 min | Very easy |
| Interior wipe-down | $10–20 | n/a | ~30 min | Easy |
Prices are 2026 estimates for the U.S. market and vary by region and trim; Canadian pricing runs higher after exchange and duties. Treat them as a directional guide, not a quote.
Jobs to leave to Tesla (or a qualified EV shop)
Not everything belongs in the driveway. A few tasks carry real risk to you or the car and should go to Tesla Service or an EV-qualified independent shop:
- Low-voltage battery replacement. Newer Model 3 and Model Y builds use a lithium-ion low-voltage battery rather than the old lead-acid unit, and the car will usually warn you well before it dies. Diagnosis and replacement are best left to Tesla.
- Brake fluid, coolant, and desiccant service. Tesla’s schedule calls for periodic brake-fluid testing and, in some climates, air-conditioning desiccant replacement — sealed-system jobs that need the right tools.
- Anything under high voltage. Never touch the orange high-voltage cabling, the battery pack, or the drive units. This is not homeowner territory.
- Tire mounting and alignment. Rotations you can arrange anywhere, but mounting new tires and setting alignment need a shop.
For a full picture of Tesla’s service network, warranty coverage, and what a visit typically costs, see our Tesla maintenance, service & warranty guide. And if you’re just settling into a new car, our new-owner accessories guide covers the gear worth buying first.
Frequently Asked Questions
Does replacing my own cabin air filter void the Tesla warranty?
No. Tesla lists the cabin air filter as an owner-serviceable item in its official DIY documentation, so replacing it yourself is expected. Your warranty only comes into question if you damage another component while doing the work, which is why it’s worth following Tesla’s step-by-step guide and using a filter kit sized for your model.
How often should I replace the cabin air filter?
Tesla’s guidance is roughly every two years for the standard filter. Replace it sooner — annually or even more often — if you regularly drive through wildfire smoke, heavy pollen, dusty roads, or dense city smog, or if you notice reduced airflow or odor when the fan starts.
What size wiper blades does a Tesla Model 3 or Model Y take?
Both use a 26-inch driver-side blade and a 19-inch passenger-side blade. Model S and Model X use different sizes, so confirm in your owner’s manual before ordering. Always put the car in Wiper Service Mode (Controls > Service) before swapping blades.
My Tesla has no spare tire — what should I do about a flat?
Keep a tire repair kit with a sealant and a 12V inflator in the frunk; it handles most small punctures well enough to reach a shop. For a sidewall blowout or large puncture, use Tesla’s in-app roadside assistance. Because there’s no spare, checking pressures regularly is your best defense against surprises.
Can I use regular glass cleaner on the touchscreen?
No. Ammonia- and alcohol-based cleaners can strip the screen’s anti-glare coating over time. Use a dry or lightly dampened microfiber cloth, and if you want extra protection, a matte tempered-glass protector both reduces glare and makes cleaning easier.
Do I still get free FSD if I order through a referral link?
Ordering a new Model 3, Model Y, or Cybertruck through a current Tesla referral link adds 3 months of Full Self-Driving (Supervised); it generally can’t be combined with the standard 30-day trial. Terms can change, so confirm the current offer on Tesla’s order page before you place your deposit.
The bottom line
A Tesla asks very little of you, but the little it does ask is easy and cheap to handle yourself:
- Cabin air filter — swap it about every two years in ~20 minutes for $25–45, versus $150+ at service.
- Wiper blades — a $25–40 set of 26″+19″ blades and Wiper Service Mode make this a 10-minute job.
- Tires — check pressures with a cheap gauge and carry a repair kit, since there’s no spare.
- Interior — clean with water-based products and microfiber only; never ammonia or alcohol on the screen.
- Leave to the pros — the low-voltage battery, brake fluid, coolant, and anything high-voltage.
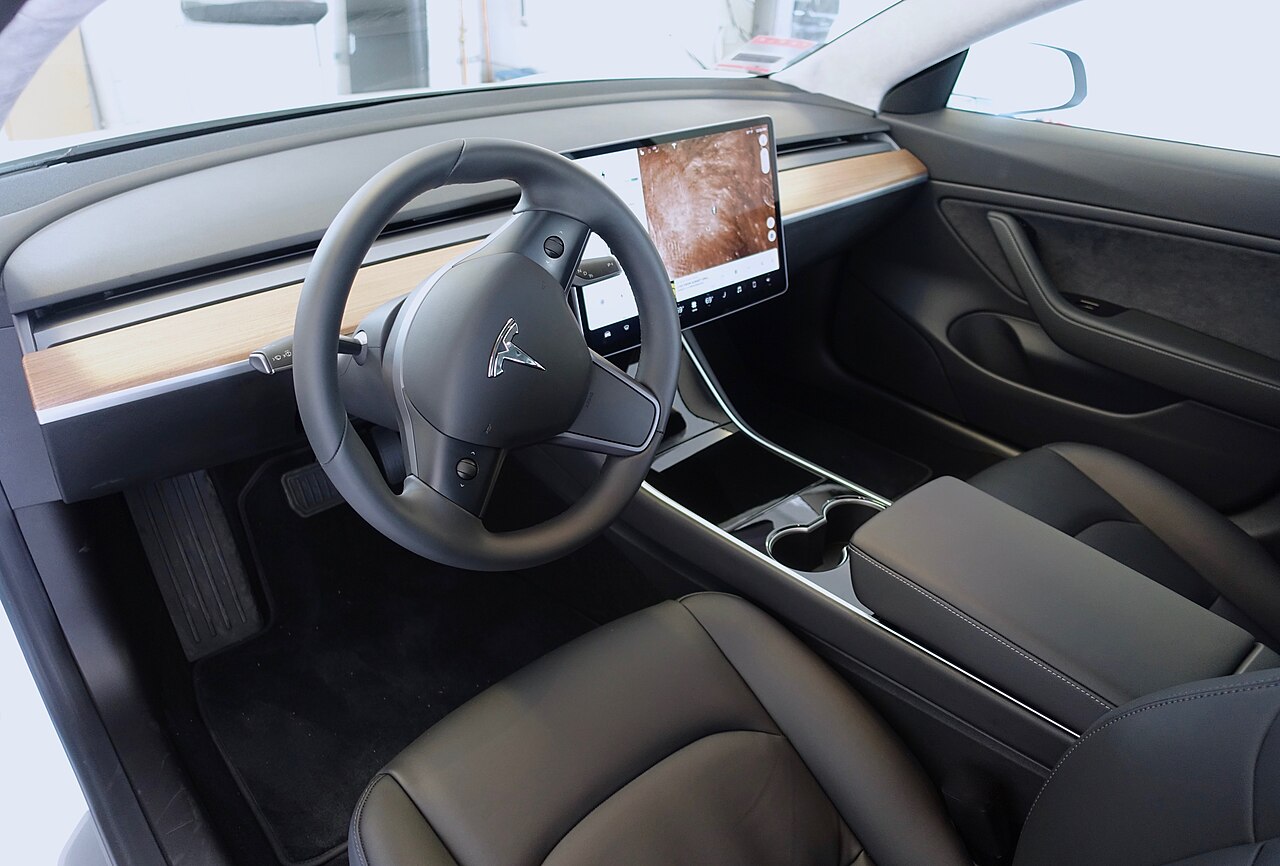
Information current as of August 2026. Pricing, parts availability, and Tesla service procedures change over time; always confirm against Tesla’s official documentation and your owner’s manual for your specific model and build year. This article is for general information only and is not professional service advice. Some links are affiliate/referral links — see our disclosure page. Image credit: “The Model 3 Interior” by Steve Jurvetson, licensed under CC BY 2.0, via Wikimedia Commons.
About the author: Lifei Zhou
Model Y owner since 2022Ontario STO registered apprentice · 310SWorks on Porsche, Mercedes, BMW, Audi weeklyHundreds of readers referred (est.)
Lifei is a Tesla owner based in Canada, writing practical, fact-checked Tesla guides for US and Canadian drivers — buying, ownership, insurance, charging, and TSLA investing, all from first-hand experience.