
Tesla Emergency Kit: What Every Owner Should Keep in the Car (No Spare Tire Edition)
Tesla Emergency Kit: What Every Owner Should Keep in the Car (No Spare Tire Edition)

In one sentence
Teslas ship without a spare tire and the low-voltage battery can lock you out. Here's the exact emergency kit to keep in your frunk — tire repair, compressor, jump starter and more.
Your Tesla is one of the safest, most reliable cars on the road — right up until you catch a nail on a dark stretch of highway and remember there’s no spare tire in the trunk. Because Tesla ships every Model 3, Model Y, Cybertruck and the outgoing Model S/X without a spare, and because the car’s low-voltage battery can leave you locked out of your own frunk, the smartest thing a new owner can do in their first week is build a small, purpose-made emergency kit. This guide walks through exactly what to carry, where to store it, and how to handle the two roadside problems Tesla owners actually run into — a flat with no spare, and a dead 12V (or 16V) battery.
Disclosure: some links are affiliate/referral links. If you buy through them we may earn a small commission at no extra cost to you, and a Tesla referral link gives you a delivery perk. See our disclosure page.
📋 Contents
Why Your Tesla Doesn’t Have a Spare Tire
Like most modern EVs, Teslas leave the factory without a spare. There are a few reasons: a spare wheel and jack add 40–50 lb of dead weight that eats into range, the space under the trunk floor is used for the battery and storage, and Tesla assumes most owners will use its mobile ranger service or a tow to a Service Center. In practice that leaves you with three realistic outcomes when a tire goes flat: plug or seal it yourself, call for a tow, or ride on run-flat-style low pressure to the nearest shop.
None of those work if you have nothing in the car. Tesla’s own tire guidance points owners to a repair kit, and Tesla Roadside Assistance covers towing for a flat only for the warranty period — after that, a tow can run $100–$300 out of pocket. A $30–$60 kit you build once pays for itself the first time you avoid a tow.
If you’re still in the buying stage, note that ordering a new Model 3, Model Y or Cybertruck through a Tesla referral link currently adds 3 months of free Full Self-Driving (Supervised), which generally doesn’t stack with the standard 30-day trial — a nice perk, though it won’t change a thing on the shoulder of I-95. That’s what the kit below is for.
The Tesla Emergency Kit Checklist
You don’t need a trunk full of gear. The goal is a compact bag that handles a flat, a dead low-voltage battery, and the basics of roadside safety. Here’s the short list, in priority order.
| Item | Why a Tesla owner needs it | Priority |
|---|---|---|
| Tire repair (plug/sealant) kit | No spare — this is your only DIY fix for a puncture | Essential |
| Portable 12V air compressor | Re-inflate after a plug, or top off a slow leak to reach a shop | Essential |
| Portable lithium jump starter | Pop the frunk and power the door latches if the 12V/16V dies | Essential |
| Tire pressure gauge | Confirm you hit the door-jamb PSI after re-inflating | Nice to have |
| Work gloves + flashlight | Roadside changes happen at night, in the rain | Nice to have |
| Reflective triangle / LED flare | Visibility on the shoulder; required by law in some areas | Nice to have |
Everything on this list fits in a single soft bag in the frunk. Let’s break down the two items that matter most — because they solve the problems that actually strand Tesla owners.
Flat Tires: Your Real Options With No Spare
When a Tesla tire loses air, your choice depends on how it failed. A clean nail or screw in the tread is usually pluggable. A sidewall gash, a blowout, or a nail you’ve already driven on for miles is not — that’s a tow. Knowing the difference on the shoulder saves you from ruining a tire with the wrong fix.
For a tread puncture, a self-service repair kit is the answer. The Slime tire repair kit is the one most Tesla owners keep in the frunk: it bundles sealant and a compressor in a small case, is EV-safe, and gets you rolling in 10–15 minutes. Expect to pay in the $25–$45 range. The one caveat every owner should know: liquid sealant coats the inside of the tire and the TPMS sensor, so treat it as a get-home fix, then have the tire professionally plugged or replaced. If you’d rather not gum up the tire at all, a string-plug kit is the cleaner alternative for a simple tread hole — but it takes a little more skill on the roadside.
You’ll also want a proper compressor. Even the best plug needs the tire brought back up to spec afterward, and a slow leak can often be managed by topping off every stop until you reach a shop. A compact unit like the AstroAI portable air compressor plugs into the 12V socket, has a built-in digital gauge so you can dial in the exact PSI from the driver’s door jamb, and runs about $30–$50. It doubles as your everyday tire-pressure tool, which is handy given how sensitive Tesla range is to under-inflation — NHTSA’s TireWise program notes that even a few PSI low hurts safety, handling and efficiency.
| Fix | Best for | Cost | Downside |
|---|---|---|---|
| Sealant + compressor kit | Small tread punctures, quick get-home | $25–$45 | Coats tire/TPMS; usually means replacement |
| String plug kit | DIYers, cleaner tread repair | $15–$30 | Takes practice; not for sidewalls |
| Roadside / tow to Service Center | Blowouts, sidewall damage | $0 in warranty, then $100–$300 | Wait time; may need flatbed |
| Aftermarket compact spare kit | Long road trips, remote areas | $150–$400 | Bulky; eats frunk/trunk space |
For most owners the sealant kit plus compressor combo is the sweet spot. If you regularly drive remote highways in the Rockies, the Prairies, or the desert Southwest, an aftermarket compact spare is worth the space. Either way, don’t rely on Tesla’s mobile service reaching you quickly outside a metro area — that’s a lesson best learned before the flat, not during. For more on sizing, load ratings and when to replace, see our full Tesla tires guide.
The Dead Battery Problem — And How to Get Back In
Here’s the failure that surprises new owners the most. Your Tesla has two batteries: the big high-voltage pack that drives the car, and a small low-voltage battery (a 12V lithium or lead-acid unit on older cars, a ~16V lithium unit on the newer Model 3 Highland and Model Y Juniper) that runs the door handles, screen, lights and locks. When that small battery dies, the car won’t power up — and because the door handles and frunk release are electric, you can be locked out of your own vehicle.
The fix is not to jump-start the car the way you would a gas car. Instead, you apply external 12V power to the tow-eye terminals behind the front bumper cover to pop the frunk, then reach the low-voltage battery. A compact lithium jump starter is the tool for this, and it’s the single most useful thing in the whole kit. The NOCO Boost Plus GB40 is the one we recommend keeping in the frunk: it’s a pocket-sized 12V lithium pack (roughly $80–$110), holds a charge for months, and also throws off a USB power bank and an LED flashlight for roadside use. Follow Tesla’s official low-voltage jump-start procedure exactly, and note one hard rule: never connect another Tesla or another EV to jump yours — use a standalone 12V source only.
The good news is these events rarely come out of nowhere. Newer 16V systems give more warning, and the app or dash will usually nag you about a low battery days ahead. If yours does, replace it before it strands you. A dying low-voltage battery is one of the most common Tesla complaints we cover in our Tesla problems and troubleshooting guide — a $10 jump starter charge beats a $200 tow every time.
Winter and Season-Specific Add-Ons
If you live anywhere from the Midwest up through Canada, cold weather changes the math. EV range drops in the cold, tire pressure falls about 1 PSI for every 10°F, and a marginal low-voltage battery is far more likely to give up on a −20°C morning. Two seasonal additions earn their place in the frunk.
First, a proper snow brush and ice scraper. Tesla’s flush door handles and cameras freeze over, and you don’t want to be clawing ice off the windshield with a credit card. An extendable option like the AstroAI snow brush and ice scraper (about $15–$25) reaches across the wide Model Y windshield without scratching the paint. Second, keep that jump starter topped up — cold is exactly when a weak 12V/16V battery fails. For the full cold-weather playbook, including preconditioning and range planning, read our Tesla winter driving guide.
Summer has its own quirks: heat degrades sealant and can swell an already-marginal battery. Rotate the sealant canister per its expiry date (usually 4–8 years) and don’t leave the kit baking in direct sun on the parcel shelf if you can store it lower in the frunk.
Where to Store It All
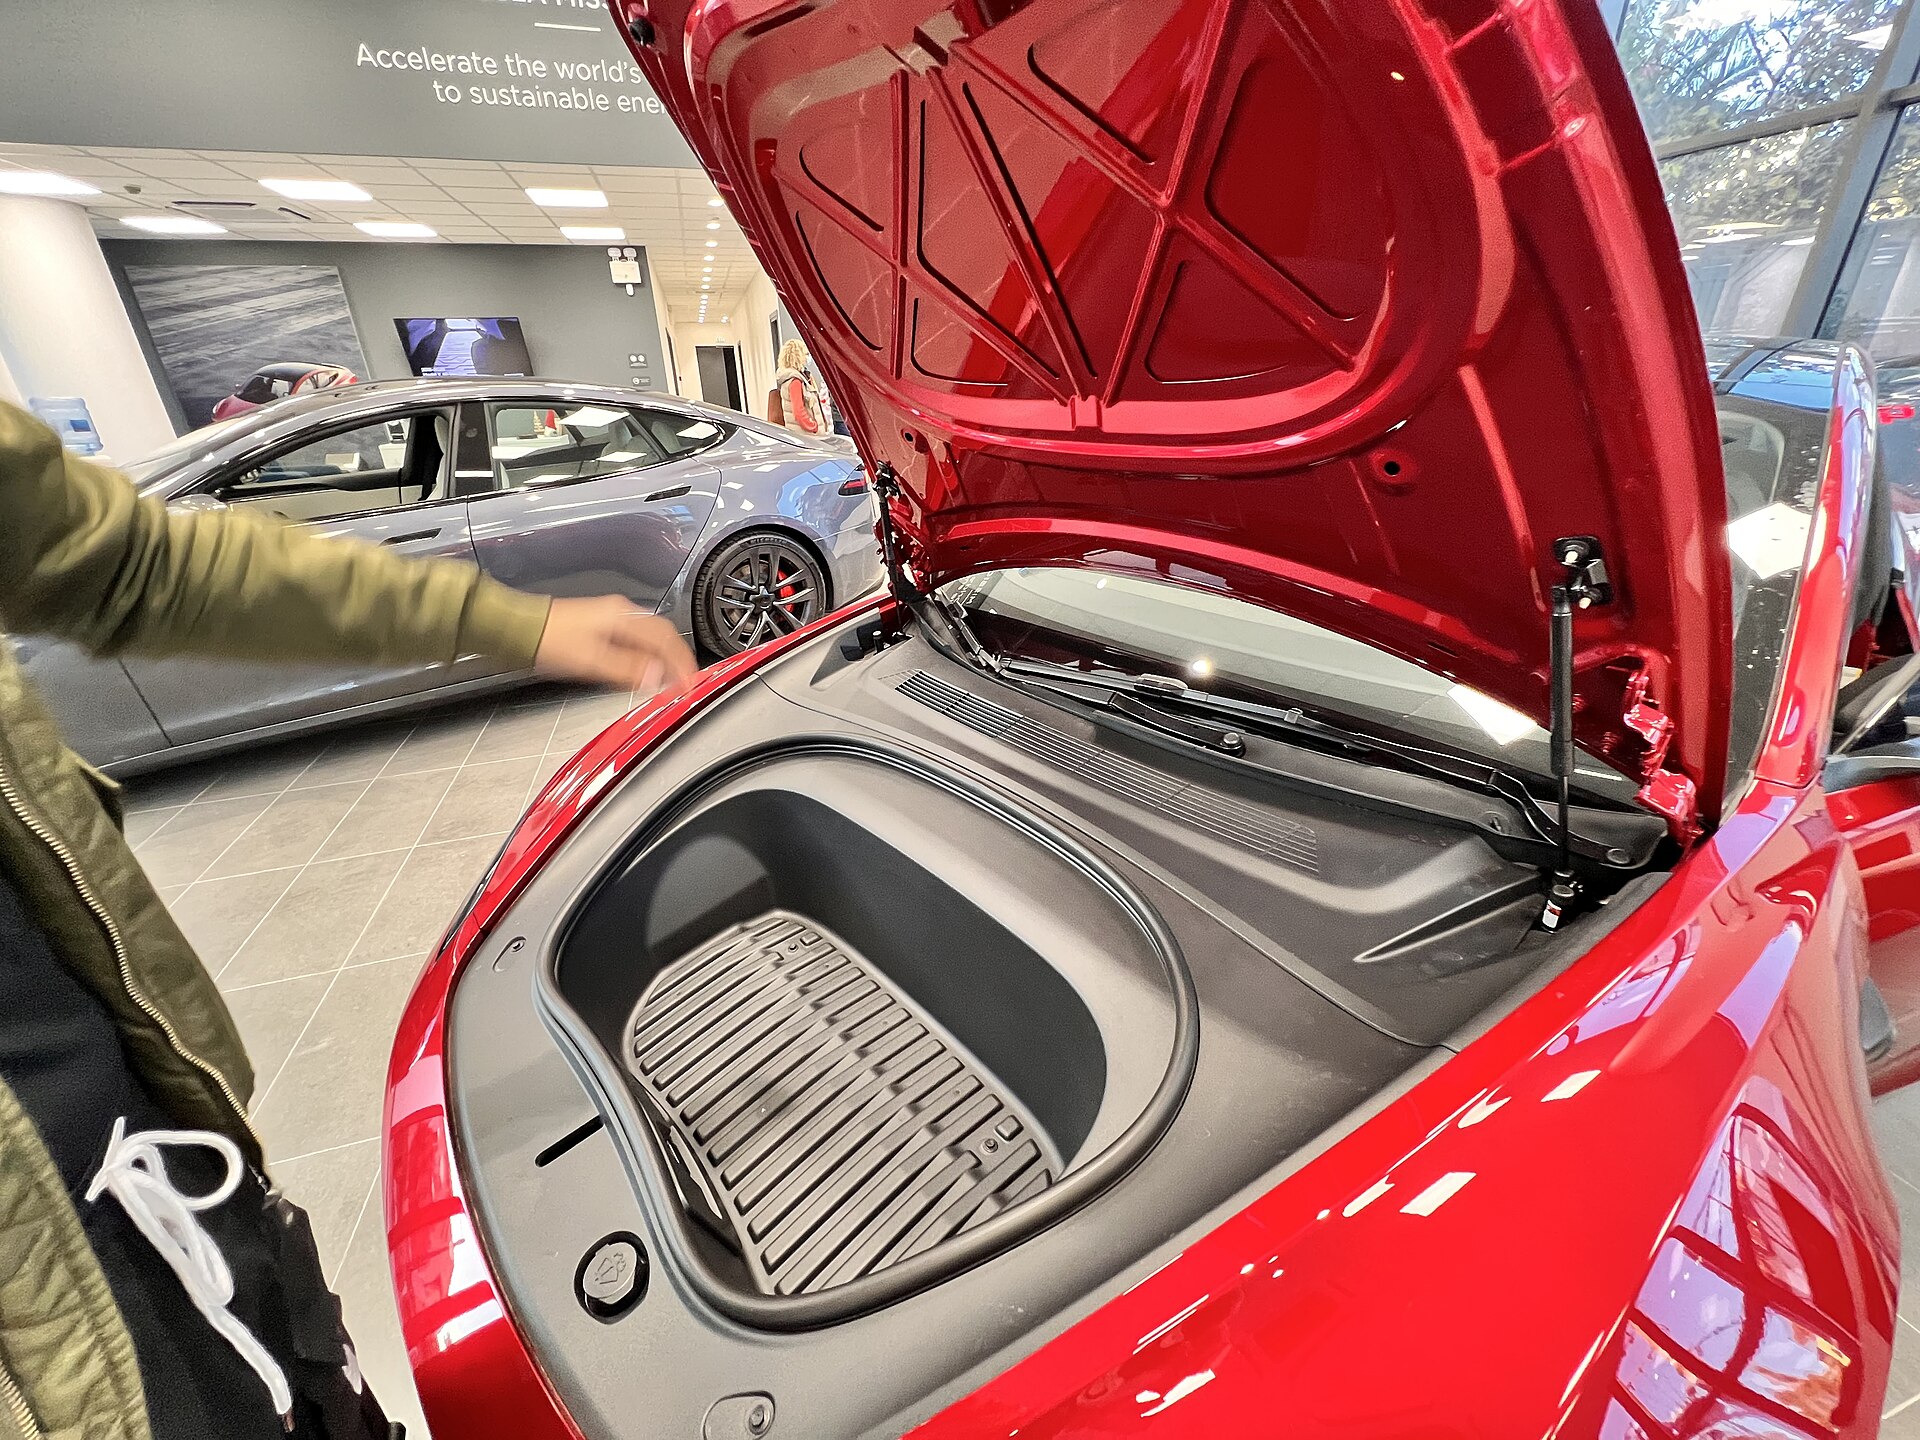
The frunk is the natural home for an emergency kit — it’s out of the way, doesn’t compete with cargo, and keeps the heavy jump starter low and forward for balance. On the Model 3 and Model Y, a single soft cooler-style bag holds the tire kit, compressor, jump starter, gloves and flashlight with room to spare. Cybertruck owners have the vault and a cavernous frunk; Model S/X owners can use the deep underfloor bins.
A few placement tips: keep the jump starter and any sealant out of extreme heat, secure the bag so it doesn’t roll around, and test the jump starter’s charge every few months. If you’re outfitting a brand-new car, our new owner accessories guide covers the rest of the first-week shopping list, and you can browse everything in our Tesla accessories section. Buyers still configuring an order can also lock in the referral perk — ordering through a Tesla referral link adds 3 months of free FSD (Supervised) at delivery.
Frequently Asked Questions
Do all Teslas come without a spare tire?
Yes. No current Tesla — Model 3, Model Y, Cybertruck, or the outgoing Model S/X — ships with a spare tire or jack from the factory. Tesla expects owners to use a repair kit, roadside assistance, or a tow. That’s why a self-service tire kit is the first thing to add.
Can I use a normal jump starter to jump-start my Tesla?
Not the way you would a gas car. You use a 12V lithium jump starter to apply power to the tow-eye terminals to pop the frunk and reach the low-voltage battery, following Tesla’s official procedure. Never connect another Tesla or EV to jump yours — always use a standalone 12V pack.
Will tire sealant ruin my tire or TPMS sensor?
Liquid sealant coats the inside of the tire and the pressure sensor, so it’s best treated as a temporary get-home fix. After using it, have the tire professionally inspected — many shops will plug and clean it, but some tires need replacing. A string-plug kit avoids the mess if you’re comfortable using one.
How often should I check the kit?
Test the jump starter’s charge every 2–3 months, check the compressor works each season, and note the sealant canister’s expiry date (typically 4–8 years). A dead jump starter or expired sealant is worse than none because it gives false confidence.
Is roadside assistance included with my Tesla?
Roadside assistance is provided under the New Vehicle Limited Warranty for the warranty period, covering towing for issues like a flat. Coverage and terms change, so confirm on Tesla’s support pages — and remember that in remote areas, help can be hours away, which is exactly why a self-service kit matters.
Summary: Build the Kit Before You Need It
- No Tesla comes with a spare tire — a sealant/plug kit plus a portable compressor is your only DIY fix for a flat.
- The low-voltage battery (12V or ~16V) can lock you out; a compact lithium jump starter to pop the frunk is the most valuable item in the kit.
- Follow Tesla’s official jump procedure and never jump from another Tesla or EV.
- Add a snow brush and keep the jump starter charged for winter; watch sealant expiry dates in summer.
- Store everything in one soft bag in the frunk and test it every few months.
- Ordering a new Tesla through a referral link currently adds 3 months of free FSD (Supervised) — but the kit is what keeps you moving after delivery.
Information is current as of August 2026 and reflects publicly available Tesla policies, which can change — always confirm details on Tesla’s official support pages and your owner’s manual before acting. Prices are approximate ranges and vary by retailer. This article is for general information only and is not professional automotive advice. Some links are affiliate or referral links; see our disclosure page. Image credit: Mpelas199, CC0 (Upgraded Tesla Model 3 – 2023 – Frunk), via Wikimedia Commons.

About the author: Lifei Zhou
Model Y owner since 2022Ontario STO registered apprentice · 310SWorks on Porsche, Mercedes, BMW, Audi weeklyHundreds of readers referred (est.)
Lifei is a Tesla owner based in Canada, writing practical, fact-checked Tesla guides for US and Canadian drivers — buying, ownership, insurance, charging, and TSLA investing, all from first-hand experience.