
Tesla Jack Points for Model 3, Model Y, S, X & Cybertruck: Where to Lift (2026)
Tesla Jack Points for Model 3, Model Y, S, X & Cybertruck: Where to Lift (2026)

Every Tesla has four approved jack points, one near each wheel: the front pair just behind the front wheels and the rear pair just ahead of the rear wheels. Lift only at those points with a jack pad (puck) seated in them, never under the battery or the side rails, and on a Model S, Model X or Cybertruck turn on Jack Mode first so the air suspension does not try to level itself.
Rotating your tires, mounting winter rubber, or just crawling underneath to inspect the undercarriage all start with the same step: getting your Tesla up in the air safely. And here is the catch that surprises a lot of new owners — you cannot lift a Tesla the way you lifted your old gas car. The flat battery pack forms the entire floor of the vehicle, and jacking in the wrong spot can crack a battery case that costs five figures to replace. This guide walks through exactly where the jack points are, why a $25 set of jack pads is non-negotiable, and the short list of tools that turns a nerve-wracking job into a 20-minute driveway task.
Disclosure: some links are affiliate/referral links. If you buy through them we may earn a small commission at no extra cost to you. See our disclosure page.
Tesla jack points at a glance (checked against Tesla’s owner’s manuals, October 14, 2026)
- Four lift points per car, close to each wheel. Tesla calls them “the only approved lifting points” and shows them in green in the manual diagram.
- Never lift under the battery or the side rails. Damage from lifting in the wrong place is not covered by the warranty.
- Model 3 and Model Y use coil springs, so there is no Jack Mode to set. Model S, Model X and Cybertruck have air suspension and need Jack Mode on (Controls > Service > Jack Mode).
- Never raise any Tesla with the charge cable plugged in, even if it is not charging.
- Lug nuts on a Model Y: 175 N·m (129 lb-ft) with a 21 mm socket, per Tesla’s service manual.
📋 Contents
- Why lifting a Tesla is different from a gas car
- Where are the Tesla jack points?
- Model 3 vs Model Y jack points: what is different
- Jack pads (pucks): the one part you cannot skip
- The home lifting kit: tools that actually earn their place
- Step by step: how to lift your Tesla safely
- Torque specs and the mistakes to avoid
- Winter tire season: the busiest time to lift a Tesla
- When to let a shop (or Tesla) handle it
- Frequently Asked Questions
- The bottom line
Why lifting a Tesla is different from a gas car
On a traditional car, you slide a jack under a steel pinch weld along the rocker panel and lift. Teslas are built differently. The high-voltage battery pack is a large, flat structural slab that doubles as the floor of the car, so almost the entire underside is a surface you must never touch with a jack. Put a jack saddle against that pack and you can dent or puncture it — and a damaged pack is not a warranty repair, it is a very expensive out-of-pocket one.
Instead, Tesla designates four lift points: one just behind each front wheel and one just ahead of each rear wheel. Tesla’s manual calls them the only approved lifting points and specifically says not to lift under the battery or the side rails, so they are the only spots you should lift from. Because the underbody is otherwise flat and smooth, those points can be hard to find by feel, which is exactly why the small rubber adapters below matter so much. If you are also thinking about seasonal rubber changes, our Tesla winter tires guide pairs naturally with learning to lift the car yourself.
Where are the Tesla jack points?
All current Teslas use the same idea: four approved lift points, each close to a wheel. Tesla’s owner’s manual for every model shows them in a diagram, with the approved points in green and the areas to avoid, the battery and the side rails, in red. Here is the quick reference, with a link to each official page.
| Model | Where the jack points are | Jack Mode needed? | Approx. curb weight | Official diagram |
|---|---|---|---|---|
| Model 3 | Just behind each front wheel and just ahead of each rear wheel | No (coil springs) | ~3,900 lb | Model 3 manual |
| Model Y | Same four-point layout as the Model 3 | No (coil springs) | ~4,400 lb | Model Y manual |
| Model S | Four points near the wheels | Yes: set suspension to Very High, then Jack Mode | ~4,600–4,800 lb | Model S manual |
| Model X | Four points near the wheels | Yes: Controls > Service > Jack Mode | ~5,200–5,400 lb | Model X manual (Maintenance > Jacking and Lifting) |
| Cybertruck | Four points; check the diagram, as the jack and stand points owners use differ | Yes: ride height Medium, then Jack Mode | ~6,600 lb | Cybertruck manual |
Curb weights are rounded and vary by trim and year; use them only to size your jack and stands. Tesla notes the exact lift point locations can vary slightly, so check the car itself as well as the diagram.
The single best way to confirm the exact locations for your car is to open the vehicle’s own documentation. Tesla publishes free, detailed lift-point diagrams in the Model 3 service manual and mirrors the guidance in the in-car owner’s manual under Wheels and Tires. Read it once before your first lift and the whole process stops feeling like a guessing game.
Model 3 vs Model Y jack points: what is different
If you are searching for Model 3 jack points or Model Y jack points, the answer is the same layout: one point just behind each front wheel and one just ahead of each rear wheel. What changes is how much room you have. The Model 3 sits lower, so a standard floor jack can struggle to slide under the side of the car with a puck on top; a low-profile jack solves that. The Model Y is taller and heavier, which makes the jack easier to place but means you want stands with real capacity headroom.
Model 3
- Jack Mode
- Not needed
- Curb weight
- ~3,900 lb
- Pucks
- Same as Model Y
Model Y
- Jack Mode
- Not needed
- Curb weight
- ~4,400 lb
- Lug nuts
- 175 N·m / 21 mm
Both use the same four-point layout and the same style of puck. The real differences are height and weight.
Neither car has air suspension, so there is no Jack Mode to set. You just unplug the charger, park in Park on flat ground and lift. I drive a 2022 Model Y Long Range, and the procedure in its manual is exactly the one in this guide.
Jack pads (pucks): the one part you cannot skip
Tesla jack pads — most people call them “pucks” — are hockey-puck-shaped rubber or polyurethane adapters with a plug or groove that seats into the jack point. They do three jobs at once: they locate the correct lift spot, they spread the load so the jack saddle never bites into paint or aluminum, and they keep the car from sliding on a smooth steel saddle. Skipping them to save $25 is the most expensive corner you can cut, because the failure mode is a cracked battery case.
A dependable four-piece set covers all four corners so you can put the car on stands at all four points for a full tire rotation. The APDTY 4-piece Tesla jack pad set is a long-running, widely used option that fits the Model 3, Y, S and X lift points and runs in the low-$20s — cheap insurance against a catastrophic mistake. Whatever brand you choose, buy solid rubber or hard polyurethane; the flimsy foam versions compress and are not worth the risk.
If you would rather never handle any of this yourself, that is a completely valid choice — but even then it is worth keeping one puck in the frunk so a roadside tow operator or tire shop lifts your car correctly. Speaking of the trunk, if you are still deciding what to keep on board, our Tesla flat-tire and spare-tire guide covers the emergency kit side of things.
The home lifting kit: tools that actually earn their place
You do not need a professional shop. A modest driveway kit handles tire rotations, seasonal swaps and under-car inspections for years. Here is what pairs well with your pucks, with realistic price ranges.
- A hydraulic floor jack. The scissor jack that came with the car is for roadside emergencies only. A proper trolley jack lifts smoothly and quickly. A 2-ton unit is plenty for one corner of a Model 3 or Y — the BIG RED 2-ton hydraulic floor jack (with a carrying case) sits in the $40–70 range. For a Cybertruck, step up to a heavier-rated jack.
- A pair of jack stands. Never — ever — work under a car held up only by a jack. Rated steel stands are the difference between a routine job and a tragedy. A set of BIG RED 3-ton double-locking jack stands ($30–50) has the capacity headroom you want even for a heavier Model X.
- A torque wrench. Re-tightening lug nuts by feel is how wheels get warped rotors — or come loose. A click-style TEKTON 1/2-inch torque wrench (25–250 ft-lb) covers Tesla’s spec with room to spare and runs about $40–60.
That is the whole list. Add the pucks and you have a complete kit for well under $150 that pays for itself after two or three shop tire rotations. If you are a brand-new owner still building out the garage, it is worth noting that ordering a Model 3, Model Y or Cybertruck through a Tesla referral link currently includes 3 months of free Full Self-Driving (Supervised). For everything else on the DIY maintenance ladder, our DIY cabin filter and wiper guide is a good next project.
Step by step: how to lift your Tesla safely
- Park on flat, hard ground. A level concrete driveway or garage floor — never grass, gravel or a slope. Put the car in Park; it applies the electronic parking brake automatically.
- Chock the wheels staying on the ground. If you are lifting the front, chock behind the rear wheels, and vice versa.
- Unplug the car. Tesla says never to raise the car with the charge cable connected, even if it is not charging.
- Model S, Model X or Cybertruck: turn on Jack Mode. Press the brake and tap Controls > Service > Jack Mode so the air suspension stops self-leveling. Model 3 and Model Y skip this step.
- Seat a jack pad in the jack point. Find the point just behind the front wheel (or just ahead of the rear), and press the puck in until it sits flat and does not wobble.
- Raise the jack until it just contacts the puck. Double-check alignment — the saddle should press the puck flat against the jack point, not against the battery floor or the side rail.
- Lift, then place a jack stand. Raise the corner (or both corners) enough to clear the tire, then get a backup support in place before any part of you goes near the car. A rated jack stand topped with its own puck is the usual choice; many people also slide the removed wheel flat under the sill as a last line of defense. The jack is only a lifting tool.
- Do your work. Rotate, swap or inspect. Never put any body part under a car resting only on a jack.
- Reverse the process and torque the lug nuts to spec (below) in a star pattern once the wheel is back on the ground.
Torque specs and the mistakes to avoid
Tesla’s Model Y service manual lists lug-nut torque as 175 N·m (129 lb-ft) with a 21 mm socket, and the Model 3 uses the same figure. For a Model S, Model X or Cybertruck, read the spec in that car’s manual before you tighten. Watch the units: setting 129 N·m instead of 129 lb-ft leaves the nuts badly under-tightened. Tighten in a star (crisscross) pattern in two passes, and always do the final torque with the wheel back on the ground so the hub cannot spin. Re-check the torque after roughly 50–100 miles — this is standard practice any time a wheel comes off. The most common driveway mistakes:
- Lifting on the flat battery pack or the side rail instead of the jack point. That is the single costliest error, and Tesla does not cover the damage under warranty.
- Forgetting Jack Mode on a Model S, Model X or Cybertruck, so the air suspension shifts the car while it is up.
- Working under a car on the jack alone, with no stand.
- Over-torquing lug nuts with an impact gun and no torque wrench, which warps rotors and can strip studs.
- Using thin foam pads that crush under load. Buy solid pucks.
Regular rotations are not busywork — evenly worn, properly inflated tires stretch your range and your dollars. The U.S. Department of Energy’s fueleconomy.gov and NHTSA’s tire safety pages both underline how much correct inflation and even wear matter for efficiency and safety. If you are chasing every extra mile, our Tesla maintenance and service guide ties tire care into the bigger ownership picture.
Winter tire season: the busiest time to lift a Tesla
In Canada and the northern US, the swap to winter tires usually happens from late October into November, once daytime temperatures stay around 7°C (45°F) or below. That is when most owners lift their car for the first time, and when tire shops book up. If you want to do it yourself, buy the pucks and stands now rather than the week of the first snow, and read our Tesla winter tires guide for sizes and brands.
In the Toronto area, come to the shop where I work for Tesla alignment and tires: XIUCHE in Markham, appointments only, 437-214-5267. For Teslas we only do alignment and tires, nothing on the battery, motors or high voltage. XIUCHE is the shop where I work, so I can stand behind the quality. I work there as a registered apprentice, not a licensed technician.
When to let a shop (or Tesla) handle it
DIY is not for everyone, and there is no shame in outsourcing. If you do not have a flat, hard surface, do not want to store the gear, or simply do not trust yourself under two tons of steel, book a mobile tire service or a Tesla Service appointment through the app. Just make sure whoever lifts the car uses proper jack points — hand them a puck if you have one. And if you are shopping for your next Tesla while you read this, ordering a new Model 3, Model Y or Cybertruck through a referral link currently adds 3 months of free Full Self-Driving (Supervised), which generally doesn’t stack with the standard trial — a small perk worth grabbing before you start collecting driveway tools.
Frequently Asked Questions
Where are the jack points on a Tesla Model Y?
There are four: one just behind each front wheel and one just ahead of each rear wheel. Tesla’s Model Y owner’s manual shows them in green and says they are the only approved lifting points. Do not lift under the battery or the side rails.
Where are the jack points on a Tesla Model 3?
The same layout as the Model Y: behind each front wheel and ahead of each rear wheel. The Model 3 sits lower, so a low-profile floor jack helps. The Model 3 owner’s manual has the diagram.
Do I need Jack Mode on a Model 3 or Model Y?
No. Jack Mode exists on cars with air suspension: the Model S, Model X and Cybertruck. It stops the suspension from self-leveling while the car is up. The Model 3 and Model Y use coil springs, so you just unplug the car, put it in Park and lift.
Can I jack up my Tesla while it is plugged in?
No. Tesla’s manual says never to raise the car with the charge cable connected, even if charging is not in progress.
Can I use the scissor jack that came with my Tesla?
Only for a roadside emergency to change a flat, and only at the correct jack point with care. Scissor jacks are unstable for any extended work. For rotations or inspections at home, use a hydraulic floor jack and rated jack stands.
Do I really need jack pads, or can I lift without them?
You need them. The jack points are small and the surrounding underbody is the battery pack. Pucks locate the point, protect the surface and stop the car from sliding on the jack saddle. At around $25 for a four-pack, they are the cheapest insurance in your garage.
What happens if I jack up a Tesla in the wrong spot?
Lifting on the flat underbody presses directly on the high-voltage battery case, which can dent or crack it. That is not covered as a warranty repair and can cost thousands. Tesla also states that damage from incorrect lifting is not covered by the warranty. Always lift only at the four approved points.
What torque should Tesla lug nuts be?
175 N·m (129 lb-ft) with a 21 mm socket on the Model 3 and Model Y, per Tesla’s service manual. Check your own manual for a Model S, Model X or Cybertruck. Tighten in a star pattern with the wheel on the ground and re-check after 50–100 miles.
How much does a full home lifting kit cost?
A four-piece puck set, a 2-ton floor jack, a pair of 3-ton jack stands and a torque wrench together run well under $150 — less than the cost of two or three professional tire rotations.
Is the Cybertruck the same as other Teslas for lifting?
Same four-point concept, but it is much heavier (~6,600 lb) and has air suspension. Tesla’s Cybertruck manual says to set ride height to Medium and turn on Jack Mode before lifting, and to use equipment rated for the truck plus cargo. Use a higher-capacity jack and at least 3-ton (6,000 lb) jack stands, and confirm your pucks are tall enough.
The bottom line
- Lift only at the four approved jack points near the wheels, never on the battery floor or side rails.
- Model S, Model X and Cybertruck need Jack Mode on before lifting; Model 3 and Model Y do not have it.
- Jack pads (pucks) are mandatory, not optional; a solid rubber four-pack is about $25.
- A complete home kit — pucks, a 2-ton floor jack, 3-ton stands and a torque wrench — costs under $150.
- Always support the car on rated jack stands; never work under a jack alone.
- Torque Model 3 and Model Y lug nuts to 175 N·m (129 lb-ft) in a star pattern and re-check after a short drive.
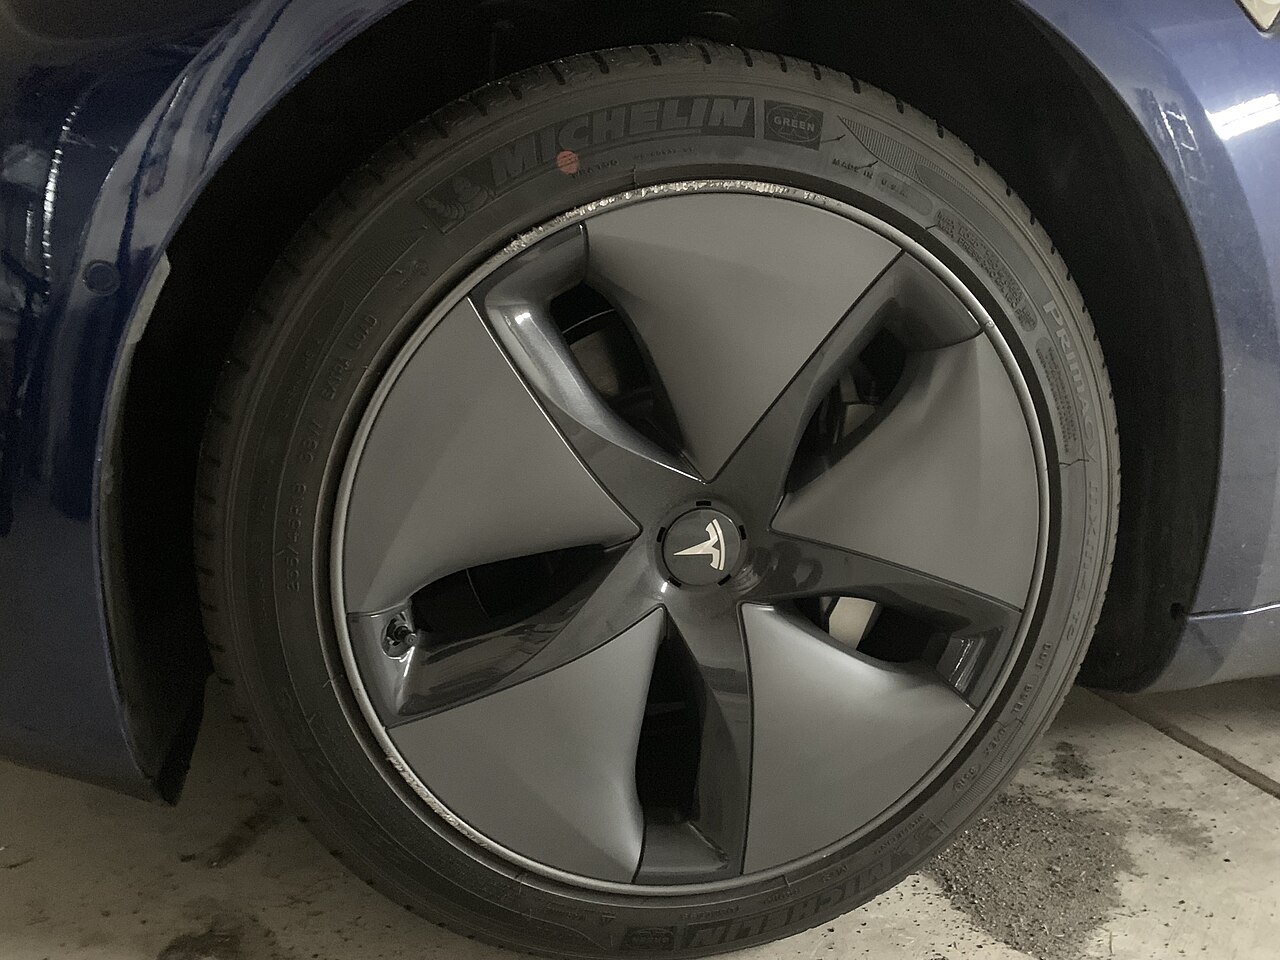
Information current as of October 14, 2026. Weights, specs and Tesla programs change — verify torque and lift points against your car’s own owner’s manual and Tesla’s official service documentation before working on your vehicle. This article is general guidance, not a substitute for professional service, and some links are affiliate/referral links (see our disclosure page). Explore more in our Tesla Accessories section. Image credit: “Tesla Model 3 aero wheels” by Saucy, licensed under CC BY 4.0, via Wikimedia Commons.

About the author: Lifei Zhou
Model Y owner since 2022Ontario STO registered apprentice · 310SWorks on Porsche, Mercedes, BMW, Audi weeklyHundreds of readers referred (est.)
Lifei is a Tesla owner based in Canada, writing practical, fact-checked Tesla guides for US and Canadian drivers — buying, ownership, insurance, charging, and TSLA investing, all from first-hand experience.